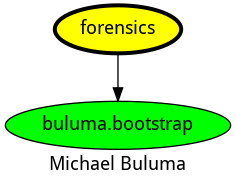
buluma.forensics
Ansible 角色 forensics
在你的系统上安装和配置取证工具。
| GitHub | 版本 | 问题 | 拉取请求 | 下载 |
|---|---|---|---|---|
 |
 |
 |
 |
示例剧本
这个示例取自 molecule/default/converge.yml,并在每次推送、拉取请求和发布时进行测试。
---
- name: Converge
  hosts: all
  become: yes
  gather_facts: yes

  roles:
    - role: buluma.forensics
机器需要进行准备。在 CI 中,这通过 molecule/default/prepare.yml 来完成:
---
- name: Prepare
  hosts: all
  become: yes
  gather_facts: no

  roles:
    - role: buluma.bootstrap
更多详细说明和示例请参见 完整示例 了解如何使用这些角色。
角色变量
变量的默认值在 defaults/main.yml 中设置:
---
# forensics 的默认文件

# 存储收集数据的本地目录。
forensics_local_storage_path: /tmp/forensics

# 要运行的命令列表。
forensics_command_list:
  - "journalctl -xe"
  - "ps -ef"
  - "lsof"
  - "systemctl status"
  - "netstat -an"
  - "netstat -tulpen"

# 收集所有文件的目录列表。
forensics_directory_list:
  - "/var/log"
  - "/tmp"
  - "/var/tmp"
  - "/var/spool/cron"
  - "/var/spool/anacron"
  - "/etc/cron.d"
  - "/etc/cron.daily"
  - "/etc/cron.hourly"
  - "/etc/cron.monthly"
  - "/etc/cron.weekly"
  - "/var/spool/at"

# 要收集的文件列表。
forensics_file_list:
  - "/etc/passwd"
  - "/etc/group"
  - "/etc/shadow"

# 要收集的特定目录和模式列表。
forensics_specific_file_list:
  - path: "/root"
    pattern: ".authorized_keys"
  - path: "/root"
    pattern: ".bash_history"
  - path: "/root"
    pattern: ".history"
  - path: "/home"
    pattern: ".authorized_keys"
  - path: "/home"
    pattern: ".bash_history"
  - path: "/home"
    pattern: ".history"
要求
- 在 requirements.txt 中列出的 pip 包。
使用的角色状态
以下角色用于准备系统。你可以使用其他方法准备你的系统。
| 要求 | GitHub | 版本 |
|---|---|---|
| buluma.bootstrap |  |
上下文
这个角色是许多兼容角色的一部分。有关更多信息,请查看 这些角色的文档。
下面是相关角色的概览:

兼容性
该角色已在以下 容器镜像 上测试:
| 容器 | 标签 |
|---|---|
| Alpine | 所有 |
| Amazon | 候选 |
| EL | 8 |
| Debian | 所有 |
| Fedora | 所有 |
| opensuse | 所有 |
| Ubuntu | 所有 |
所需的最低 Ansible 版本为 2.12,并进行了以下测试:
- 以前的版本。
- 当前版本。
- 开发版本。
如果你发现问题,请在 GitHub 上注册。
